Tuesday, May 28, 2013

Gluing the top

Now Kirk attaches the top to the sides- or is it the sides to the top? Anyway, here's a view from inside. That Brazilian rosewood lining looks great!


The three-piece back (Mediterranean cypress/Brazilian rosewood) is braced and ready to go.


Here's a view from the outside.


And one more from the inside.


Both backs are done, and join the other backs waiting their turn.


Looks like it's ready to be glued! (That's my personal guitar, #642.)


Next time- gluing the back!

-Craig

Thursday, May 16, 2013

Finishing the top

With the soundhole ring inlaid, Kirk turns his attention to bracing the top. First, the wood is trimmed to the template (notice it now has the cutaway). Then Kirk installs the bracing.


The reinforcement patch on the upper right is where the channels for the slider controls will be cut.


Our mutual friend John Knowles stopped by Kirk's shop while the top was being finished. Here John is conducting olfactory testing of the soundhole. (He assured me that the top smells as good as it looks.)

photo by Kirk Sand, courtesy of John Knowles

Here's a closeup of the completed top. Check out the grain of the Brazilian rosewood ring.

photo by John Knowles

The top is inlaid, trimmed, braced, and ready to glue to the sides.

photo by John Knowles

Next, gluing the top!

-Craig

Wednesday, May 1, 2013

Making the rosette

The Kirk Sand electric classical guitar I've been playing since 1996 doesn't have a sound hole, but my signature model guitar will. For it, I told Kirk I wanted something other than a standard classical guitar rosette (as shown below). 


Rather than marquetry, I suggested a simple Brazilian rosewood ring, to match the rosewood accents on the guitar. Kirk's response (as always) was "I can do that!" As you will see, "a simple Brazilian rosewood ring" is not such a simple process.

First, Kirk carefully drew the pattern onto the template with a compass.


Then, he glued up two lengths of Brazilian rosewood.


Ready to go.


Using a Dremel tool to cut the ring. Notice the dowel to guide the Dremel.


First one is finished.


Both done. (Remember, Kirk is making two guitars- my personal guitar and the first order.)


The rosewood ring will be double bound in black, white, and red.


Bound and finished.


Checking against the template before cutting a channel for the ring.


Ready to go. Notice the razor blade and the serial number of the guitar penciled on the top.


Ring inlaid into the top. Perfection!


Soundhole cut out. Notice the top is not yet cut to the template.


Both rings done.


Next time: finishing the top!

-Craig


Thursday, April 18, 2013

Completing the sides

One of Kirk Sand's special design touches is lining the sides of the guitar for strength, beauty, and projection. His rosewood instruments are usually lined with mahogany, so he thought it would be a nice touch to line the Mediterranean cypress sides of my guitar with Brazilian rosewood. Kirk said, "This is just a little something special for the player- you'll look down into the soundhole and see this beautiful Brazilian rosewood looking back at you!"


Here, the sides are lined and ready for the kerfing.


Kerfing done on two sets of sides. One is the prototype (my personal guitar), and the other is its "twin." Sorry, it's already sold- but Kirk will be making more...


Here's another view of both sets.


I love the grain of that Brazilian rosewood. The kerfing is Spanish cedar.


As I mentioned in a previous post, the guitar will have a Brazilian wedge on the back, and also Brazilian rosewood lining and binding. Here's one more view of the finished sets of sides.


Now, the sides are ready for the top and back! The two sets on the left are Craig Dobbins Models, lined with rosewood. The two sets on the right are rosewood guitars, lined with mahogany.


Next time- making the rosette!

-Craig

Monday, April 8, 2013

Bending the cutaway

As Kirk promised last time, "As soon as I make the neck block, I'll be bending the cutaway." After choosing the wood, he numbers the blocks and draws a center line.


Carefully calculating the curve in the neck blocks. Kirk uses only the most advanced techniques and equipment:  "The more tape I use from that roll, the smaller the radius gets!"


Done. The neck block will be positioned at the top end of the body.


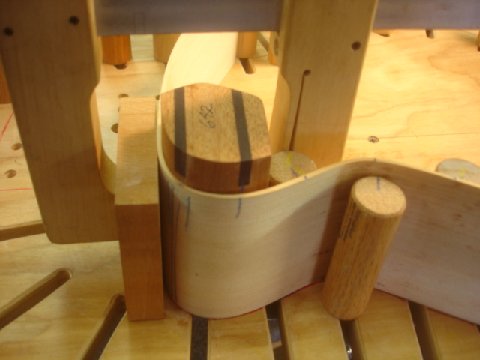
Next, bending the cutaway. The wood will be carefully bent around blocks to match the template.


Moistening the cypress allows Kirk to bend it to shape.


Now, the first bend. Kirk says, "One bad move and you are starting all over again."


So far, so good . . .


Now, another block is positioned.


A little more water to keep the wood moist, and the second bend.


Success!


Please don't break...


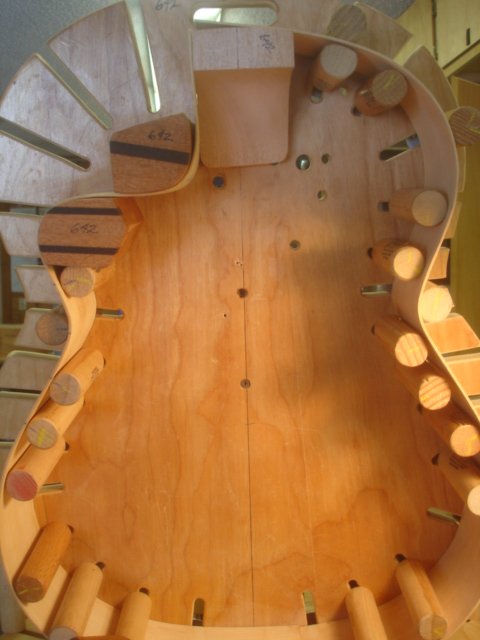
Now, the neck block is positioned.


Beautiful!


Is it just me, or is it starting to look like a guitar?

Saturday, March 23, 2013

Getting started

With the the wood selected and the templates drawn, the first job is- bending the sides! Below is a length of Mediterranean cypress ready to be heated . . .


. . . and bent. Check out the grain on that cypress!


When the wood is pliable, Kirk carefully bends it into shape on a special pegboard template.


Little by little, the sides of the guitar take shape.


Kirk: "Here we go- sides are bent! As soon as I make the neck block, I'll be bending the cutaway."


I can hardly wait!

-Craig